Episode 8: FTP Accounts
FTP (File Transfer Protocol) is a common way to transfer files between your local computer and your web hosting account.
In this episode, we'll learn about what is an FTP Account, and a step-by-step guide on how to set up and use an FTP account

What is an FTP Account
An FTP (File Transfer Protocol) account is a user account that allows you to access and manage files on a remote server or website using an FTP client. An FTP account typically includes:
- Username: A unique username assigned to the account, which is used to log in to the FTP server.
- Password: A password associated with the username, which is used to authenticate the login.
- Hostname or IP address: The domain name or IP address of the FTP server that you will be connecting to.
- Port number: The port number that the FTP server is listening on, usually 21 (FTP) or 990 (FTP over SSL/TLS).
- Home directory: The root directory on the FTP server where your files will be stored.
With an FTP account, you can:
- Upload files to the remote server: Transfer files from your local computer to the remote server.
- Download files from the remote server: Retrieve files from the remote server to your local computer.
- Manage files on the remote server: Create, delete, rename, and modify files on the remote server.
- Manage directories on the remote server: Create, delete, and rename directories on the remote server.
- Set permissions: Set permissions for files and directories on the remote server to control access and security.
FTP accounts are commonly used for:
- Website management: Upload and manage website files, such as HTML, CSS, and images.
- File sharing: Share files with others by uploading them to a shared FTP location.
- E-commerce: Upload product images, descriptions, and other files to an e-commerce platform.
- Backup and archiving: Store backup copies of files and data on an FTP server.
FTP accounts can be accessed using various FTP clients, such as:
- FileZilla
- Cyberduck
- WinSCP
- CuteFTP
When creating an FTP account, it's essential to ensure that the password is strong and unique, and that you follow best practices for securing your account and data.
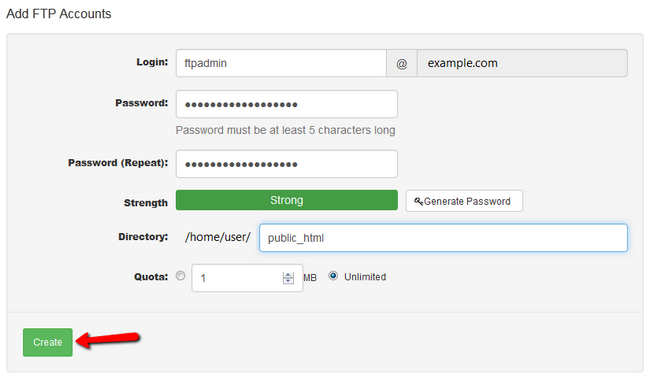
How to create an FTP Account
- Login - The username for this FTP account (you must type the entire username when using ftp applications ex: ftpadmin@example.com)
- Password - The password for this FTP account
- Password (Repeat) - Repeat the password and make sure it matches with the one above
- Strength - The strength of your password (we recommend using a good/strong level password and taking advantage of the Random Password Generator)
- Directory - The directory which will be accessible with this FTP account (if you want to delegate access to a developer only for a certain folder, you can do so by selecting the directory to it in this field)
- Quota - The amount of MB that can be uploaded/downloaded when using this account (if you want to limit the amount of data a developer can work with you can do it via the Quota field)
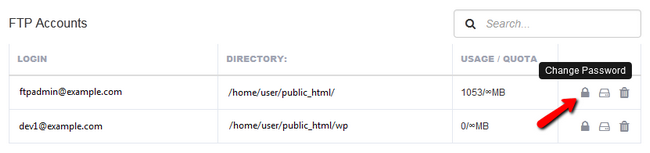
Manage your FTP Accounts
If you scroll down, you will see your already existing accounts and you will be able to manage them accordingly. To change the password of an account, click the locker icon for that account.
You will be prompted to select a new password for the account and confirm it.
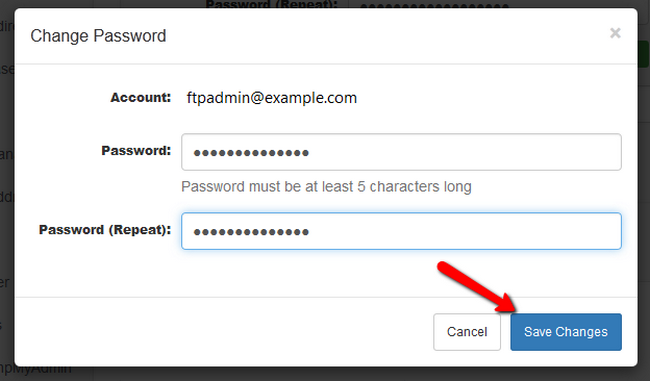
When you have done that, click on the Save Changes button.
If you wish to change the Quota for an account, click on the hard disk icon for that account.
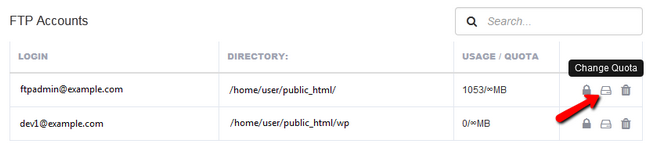
Now you will be able to change the quota to a fixed amount of your choice by clicking on the Save Changes button.

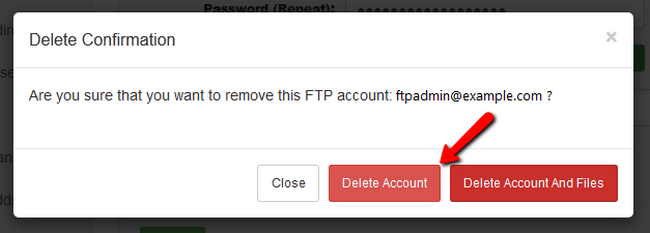
To completely remove a FTP account from your hosting account, click on the trash bin icon.

Now you can choose between deleting only the account or removing both the account and the files uploaded via it. Usually you will only remove the account.
Congratulations, you now know how to manage the FTP accounts for your hosting account with Reliant :)
Was this article useful?
Share with collogues and friends!